 |
Team Drives introduction and instruction |
|
|
- Google Team Drives is a public space, where can make your team to store, search and save the file easily through any device at any time.
- The date in Team Drives is shared with every team members instead of a person. Even if someone doesn’t belong to the team anymore, the file will still keep in the Team Drives. Therefore, other members can still share the file and go on with their works.
|
|
|
|
(A)The comparison between My Drive and Team Drives |
|
|
|
Team Drives
|
My Drive
|
|
What type of data can add?
|
All types(Except for Google map)
|
All types
|
|
Who is the owner of file and the folder?
|
Team
|
A person who create the file or folder
|
|
If I can move the file or the folder?
|
Users only can move the file
Administrator can move the folder
|
Yes
|
|
If I can synchronously move the file to my computer?
(It depends on the synchronous processing solution)
|
Drive File Stream: Yes
Being backed up and synchronized: No
|
Yes
|
|
shared
|
All files are the same to team members.
|
Each user may find different file in one folder, which depends on individual authority to every user.
|
|
How long will the file be kept in the recycle bin after being deleted?
|
Every Team Drives has a recycle bin.
The file and folders in recycle bin will be deleted for good after 30 days.
However, team members can delete the file in 30 days in advance.
|
Before the user selects “delete permanently”, the system will keep the file or folder in the recycle bin for good.
|
|
Can I return the file?
|
If you own the edit authority or complete authority, you can restore the file.
|
|
The restriction of “Team Drives”
- You need to have Google account.
- It belongs to Cloud Drive.
After logging in G suite and select “Team Drives”, you are allowed to use “Team Drives” service. You can process the following operations.
- Add the folder, upload the folder, upload the file, the online edit data of Google format such as document spreadsheet, briefing and forms.
- After selecting the file, you can set to share “Shared with me”, while you cannot share “Shared with me” of the folder of “Team Drives” and the shared link.
- Manage the selected folder or file.
|
|
|
|
(B)New-The instruction for building “Team Drives” |
|
|
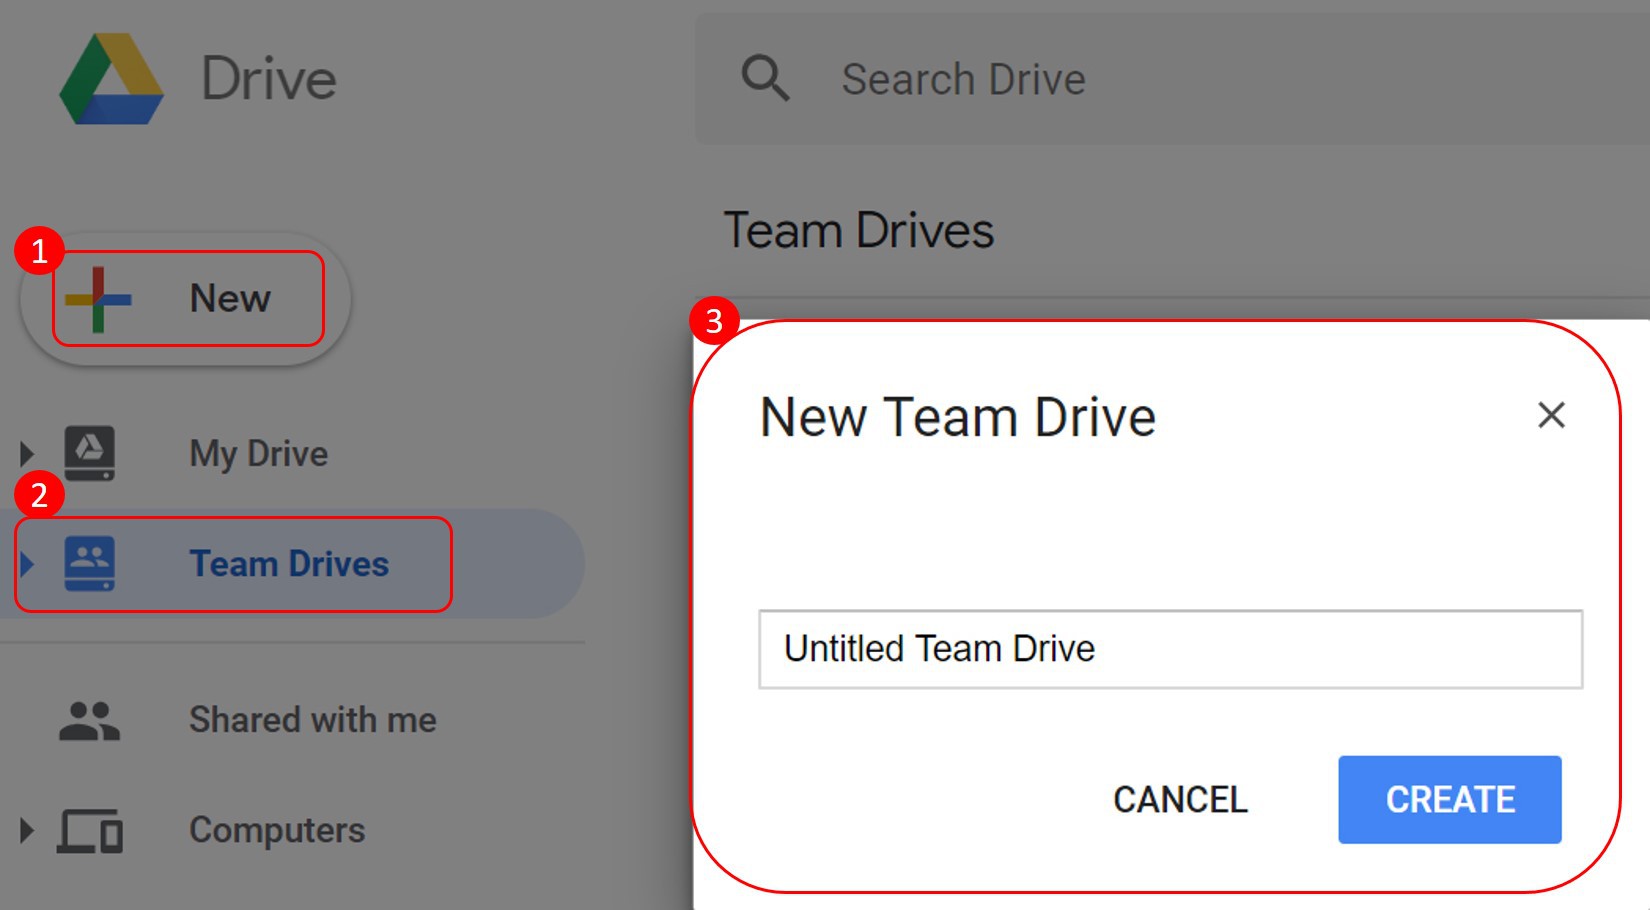
Building “Team Drives”
- Open Cloud Drive
- Click on “Team Drives” in the navigation bar in the left side.
- Click on the “Add” on the top.
- Enter the name.
- Click on “Build”.
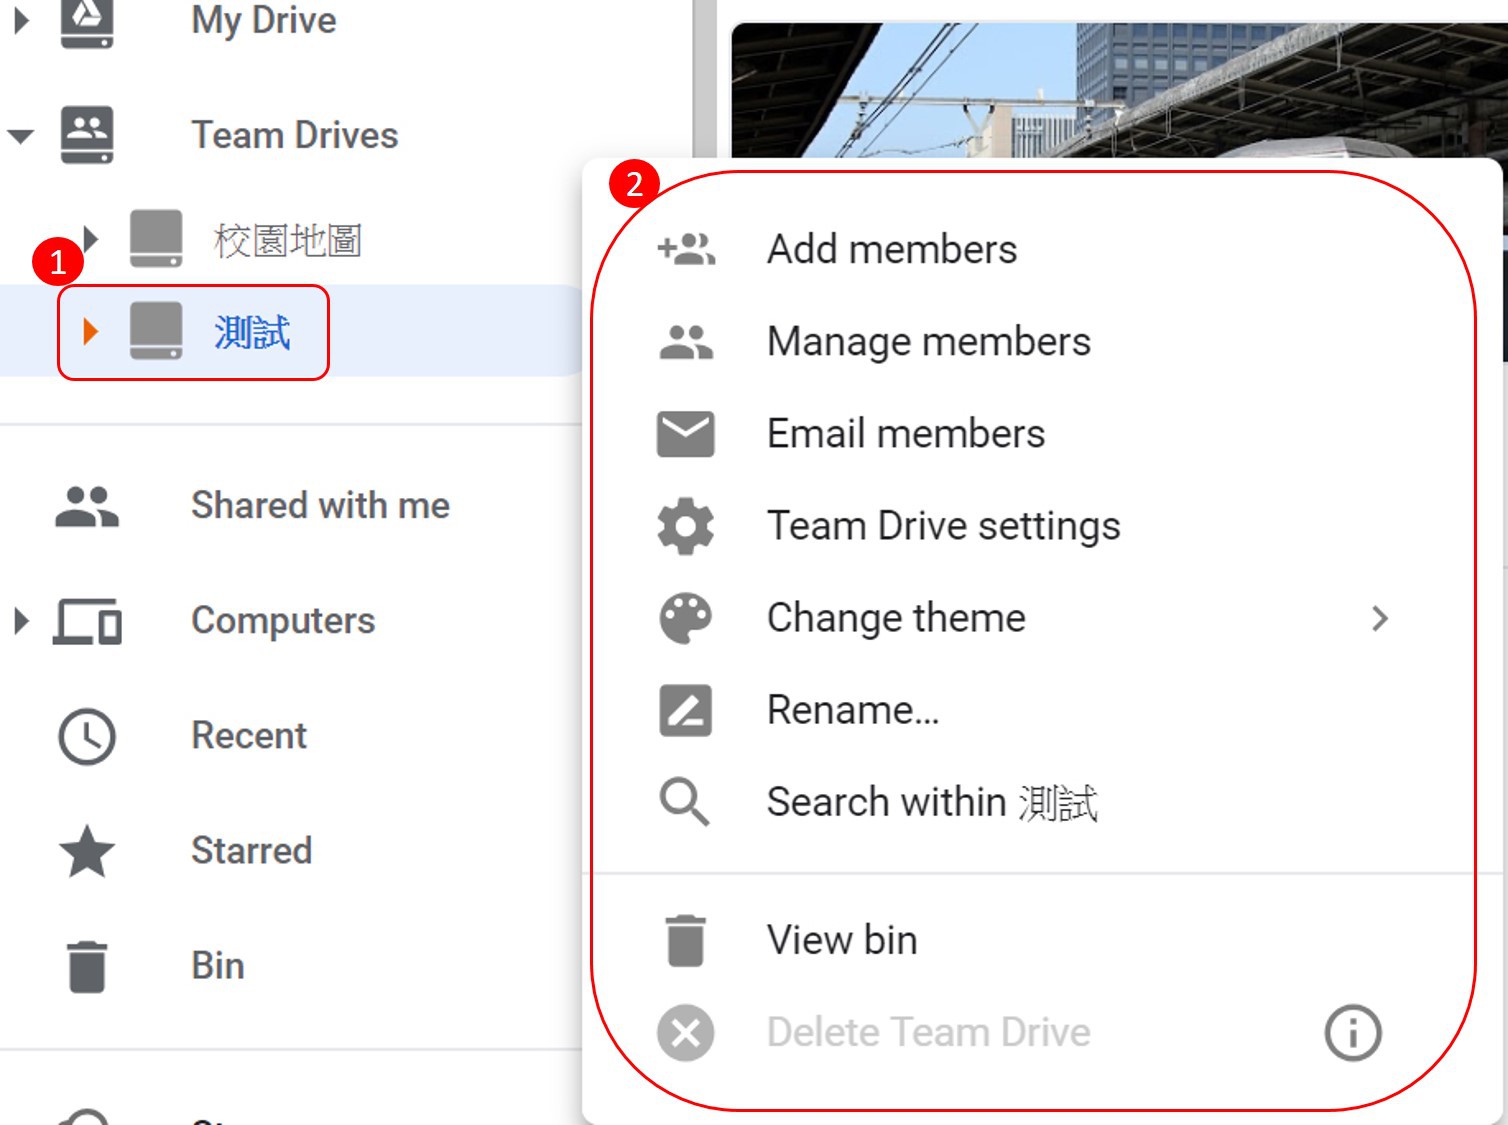
After selecting “Team Drives”, you can process the following instruction:
Increase the members, manage the members, the email members, change the subject, rename, search in the “Team Drives”, check the recycle bin.

- You need to have complete authority to increase the members and set the authority.
- The members you increase will achieve complete authority. They can upload, edit and delete the file. They can also invite others to join in. However, you still can alter the members’ authority.
- Click on the “Team Drives” in the left side and double click on one of the “Team Drives”.
- Clock on the “+Add members” on the top,
- Add the name, email address or Google group.
- According to pre-setting, new members own the “complete authority” so they can increase, edit and delete the file and also add other members to join in.
- If you want to alter the access authority of new members, please click on the down arrow and select one option.
- If you want to alter about whether new members can receive the notice, please click on “Not sending notice”.
- Click on “send”.
The authority of members:
|
Complete authority
|
Edit authority
|
Annotation authority
|
Inspection authority
|
|
Being allowed to check the file and folder
|
V
|
V
|
V
|
V
|
|
Being allowed to annotate in the file
|
V
|
V
|
V
|
|
|
Being allowed to edit the file
|
V
|
V
|
|
|
|
Being allowed to create and upload the file and build the folder
|
V
|
V
|
|
|
|
Being allowed to increase or delete the users in “Team Drives”
|
V
|
|
|
|
|
Being allowed to add the users in specific file
|
V
|
V
|
|
|
|
Being allowed to move the file and folder
|
V
|
|
|
|
|
Being allowed to delete the file and folder
|
V
|
|
|
|
|
Being allowed to return the file from recycle bin
|
V
|
V
|
|
|

You have to own complete authority to alter the members’ authority.
Click on the “Team Dives” in the left side and double click on one of “Team Drives”.
Click on the down arrow which is next to the name of “Team Drives” on the top.
Click on “Manage the members”
Click on the down arrow which is on the right side of the changed authority users.
Click on one of the option.
Click on “Complete”.

Send the email to members.

Change the icon of the theme of “Team Drives” so as to manage and distinguish it easier.

Rename
Search and select the folder or file in “Team Drives”.
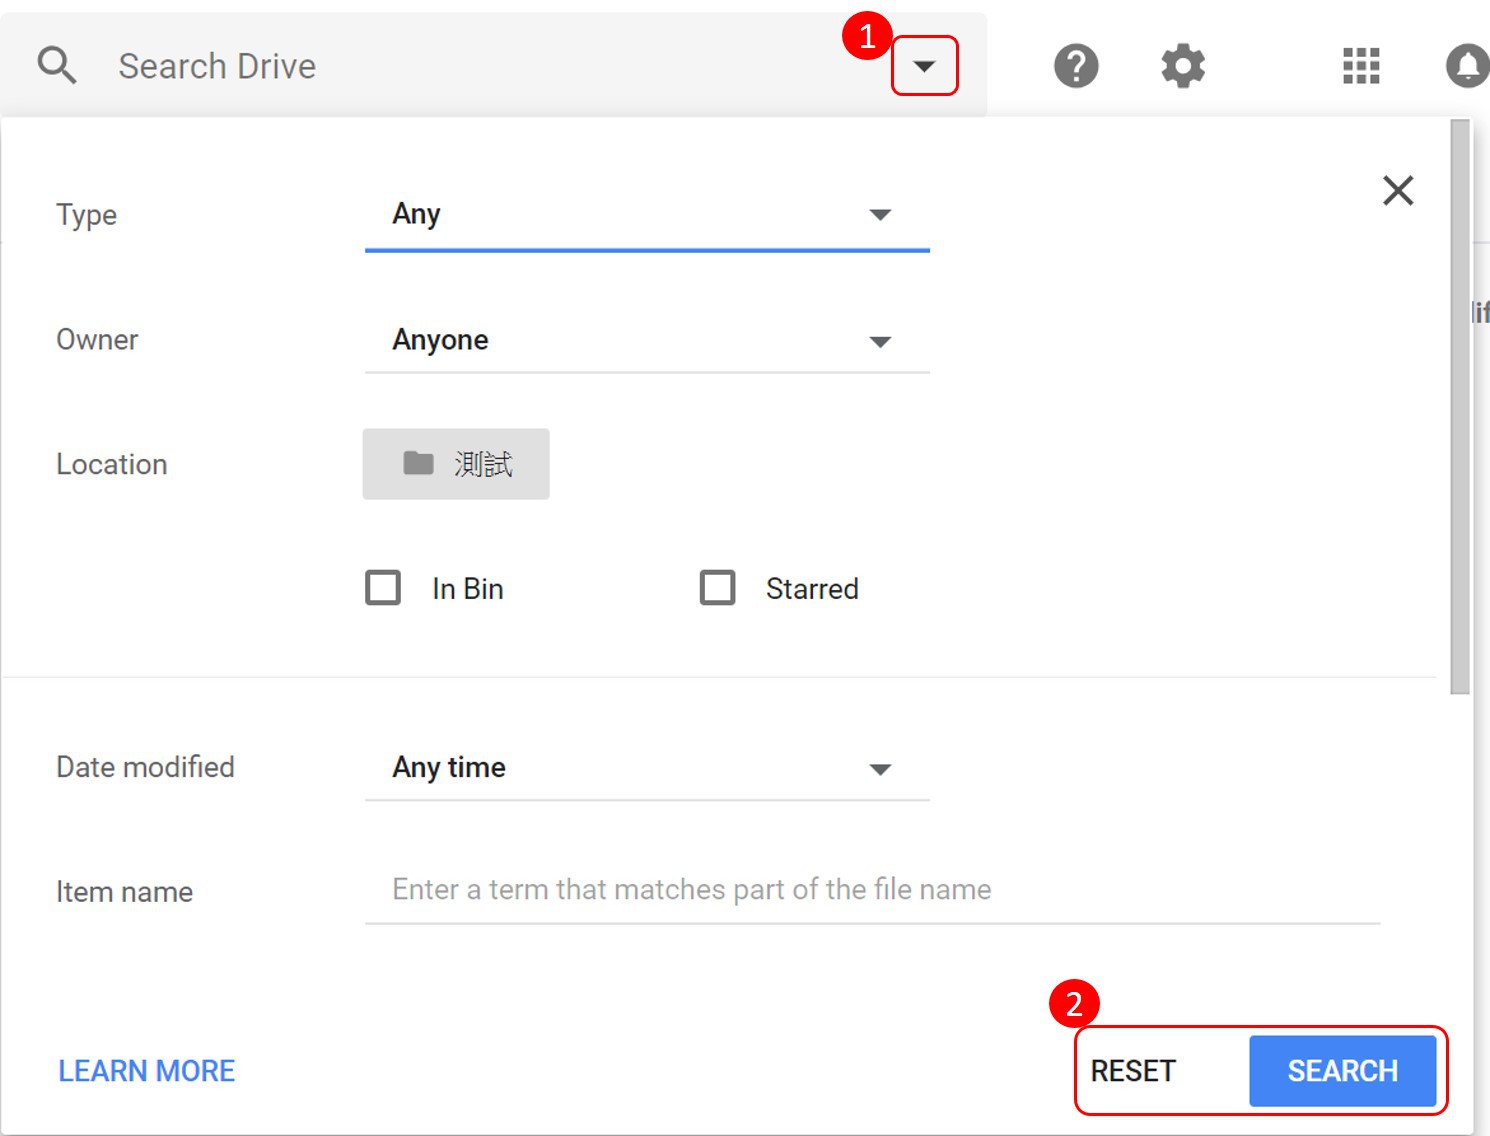
You only need to utilize the filtering function to narrow the searching range, you can easily find the file you need in the drive.
- Enter the words you want to check in the search box on the top.
- If you want to narrow the searching range, please click on the down arrow.
- If you want to set the filtering condition, the condition you can specify includes:
- Type: The type of the file such as document, photos or PDF.
- Revised date: The date edited last time.
- The name: Only search for the title of the file.
- Included words: The words in the searching document.
- Owner: The owner of the file.
- Shared object: The user can inspect, edit or annotate the file.
- Location: The location of the file such as “recycle bin” or “asterisk marked”.
- Tracking item: Files include the instructor items assigned to you or the suggested items in the file you own.

Every “Team Drives” has their own recycle bin, which can save the deleted folder of file for 30 days. Over 30 days, the file will be deleted by system for good.

Only the “Team Drives” without saving folder of file can be deleted.
“Team Drives” which is deleted can not be returned.
|
|
|
|
(D)Increasing New instructions |
|
|

Select any one of “Team Drives” or current folder, and create a folder in “Team Drives”.
Use the method you build other folders in the computer, and create a new folder in the “Team Drive” in the Drive folder.

Upload the file from personal computer to “Team Drives”

Upload the folder from personal computer to “Team Drives”
|
|
|
|
(E)After selecting the folders in “Team Drives”, you can process the following instructions: |
|
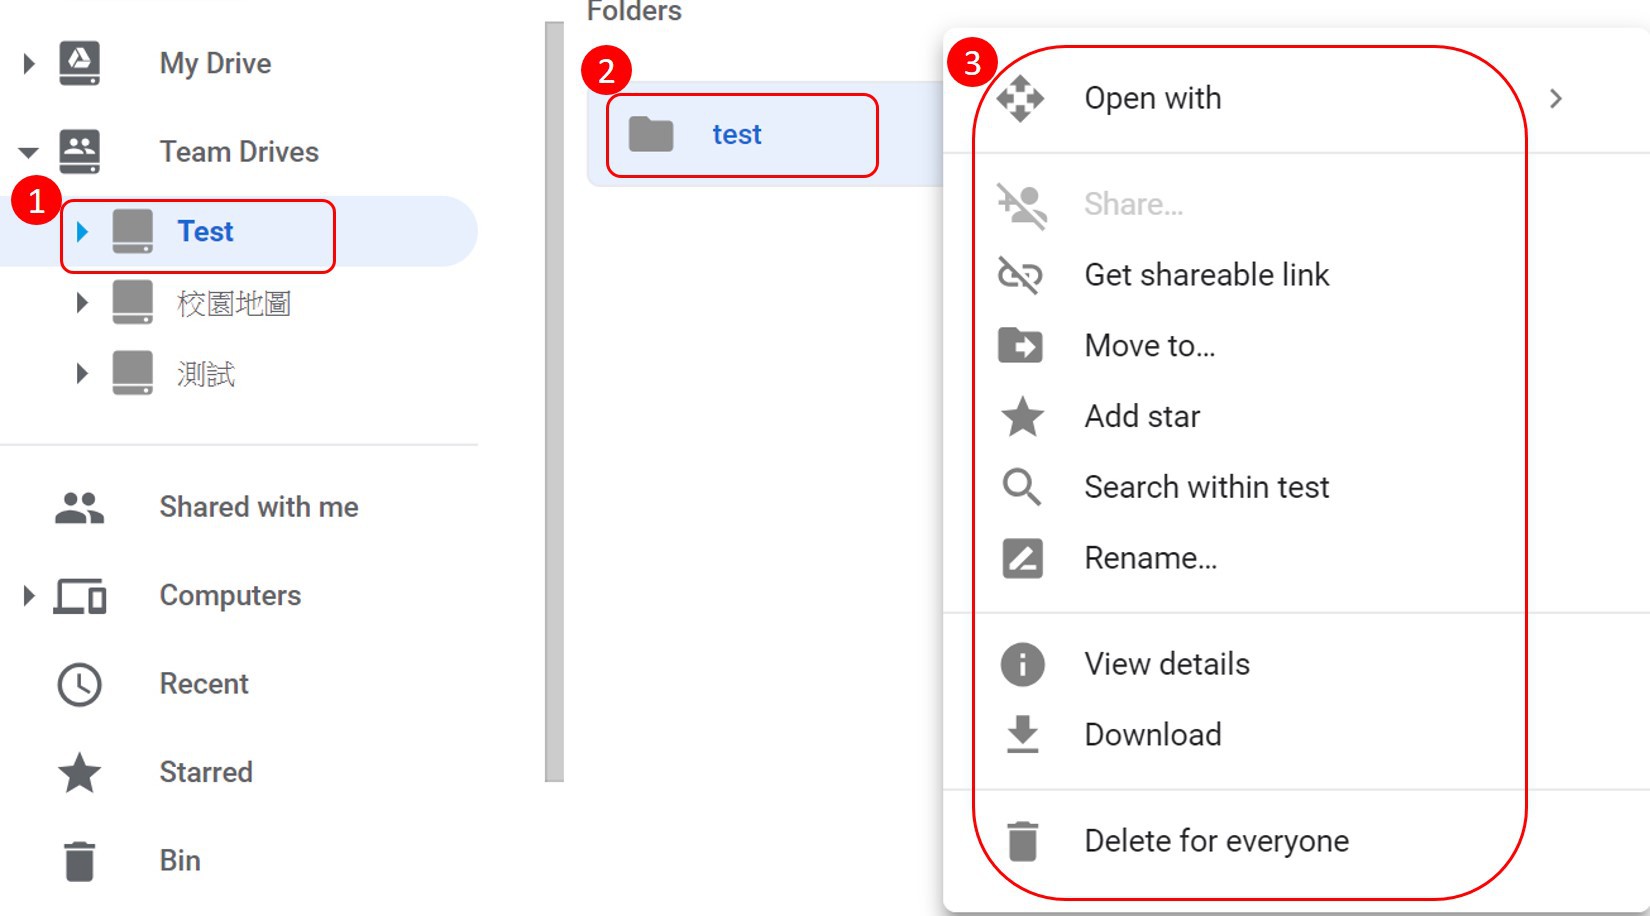
Select opened tools, new folder, shared, shared link of the file, move to, change the color, search in the folder, rename, download, remove.

Select appropriate application to use.

Move the folder to “My Drive”, “Team Drive”, “Shared with me” or other folders of “asterisked”.

Add the asterisk to the folder to mark it as an important folder or also can remove it.

Search the folder or file in the selected folder.
You only need to utilize the filtering function to narrow the searching range, you can easily find the file you need in the drive.
- Enter the words you want to check in the search box on the top.
- If you want to narrow the searching range, please click on the down arrow.
- If you want to set the filtering condition, the condition you can specify includes:
- Type: The type of the file such as document, photos or PDF.
- Revised date: The date edited last time.
- The name: Only search for the title of the file.
- Included words: The words in the searching document.
- Owner: The owner of the file.
- Shared object: The user can inspect, edit or annotate the file.
- Location: The location of the file such as “recycle bin” or “asterisk marked”.
- Tracking item: Files include the instructor items assigned to you or the suggested items in the file you own.
- Click on the “Search” in the bottom

Rename the folder

Compress the folder to download it to personal computer.

The folder which was deleted in the recycle bin will be removed for good after 30 days.

If there is the folder you want to retain in the recycle bin, please return it to “Team Drives”.
|
|
|
|
(F)After selecting the file in “Team Drives”, you can process the following instructions: |
|
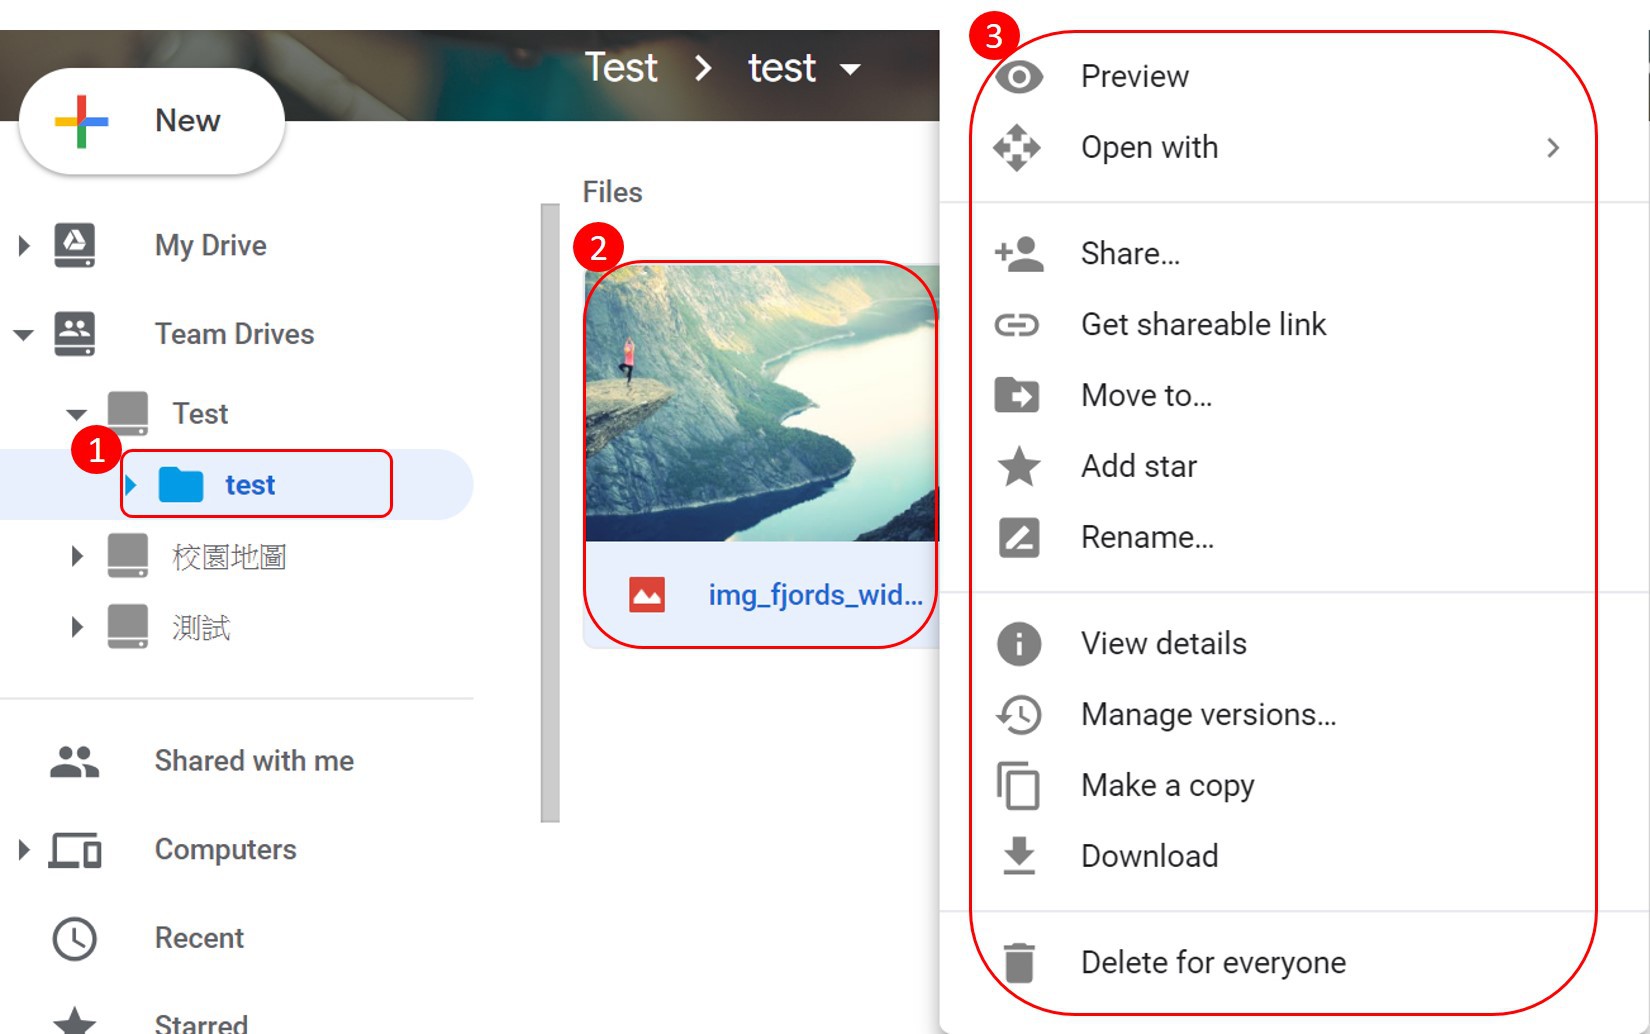
Achieve the shared link of the file, shared, preview, remove, select opened tools, move to, add the asterisk, rename, manage the version, create a copy, download.

Share the link of the file to others and they must have Google account.
You can send the link of file to other users, which can make them to use the file.
Select the link of file you’re going to share, and click on “Get shareable link” in the upper right corner. The setting of the link is opened.
Copy the link and paste it in the email or any place you want to share the file.
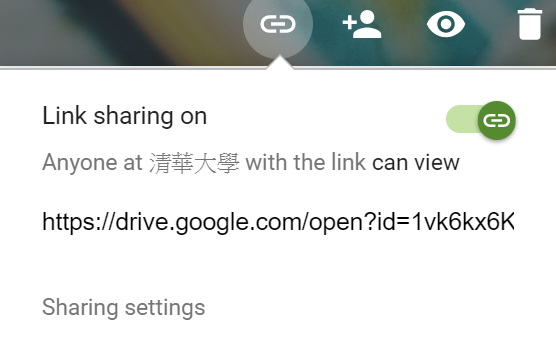
Open the shared link of the selected file, and all users who know the link in NTHU can keep to save the file.

Share the file in “Team Drives”.
- You can share the file in “Team Drives” with any people in work place or school.
- When you share the file with others through “Team Drives”, you can specify them to set if they can edit, annotate or just inspect the file.
- Note: If you’re going to edit Microsoft Office file with others, you need to transfer the file to Google document, spreadsheet or briefing.
Share the single file
- In “Team Drives”
- Click on the file you’ll share.
- Click on “shared” or the icon of shared.
Share several files
- In “Team Drives”
- Hold the “shift” button on the keyboard to select over two files.
- Click on the “shared” icon in the upper right corner.
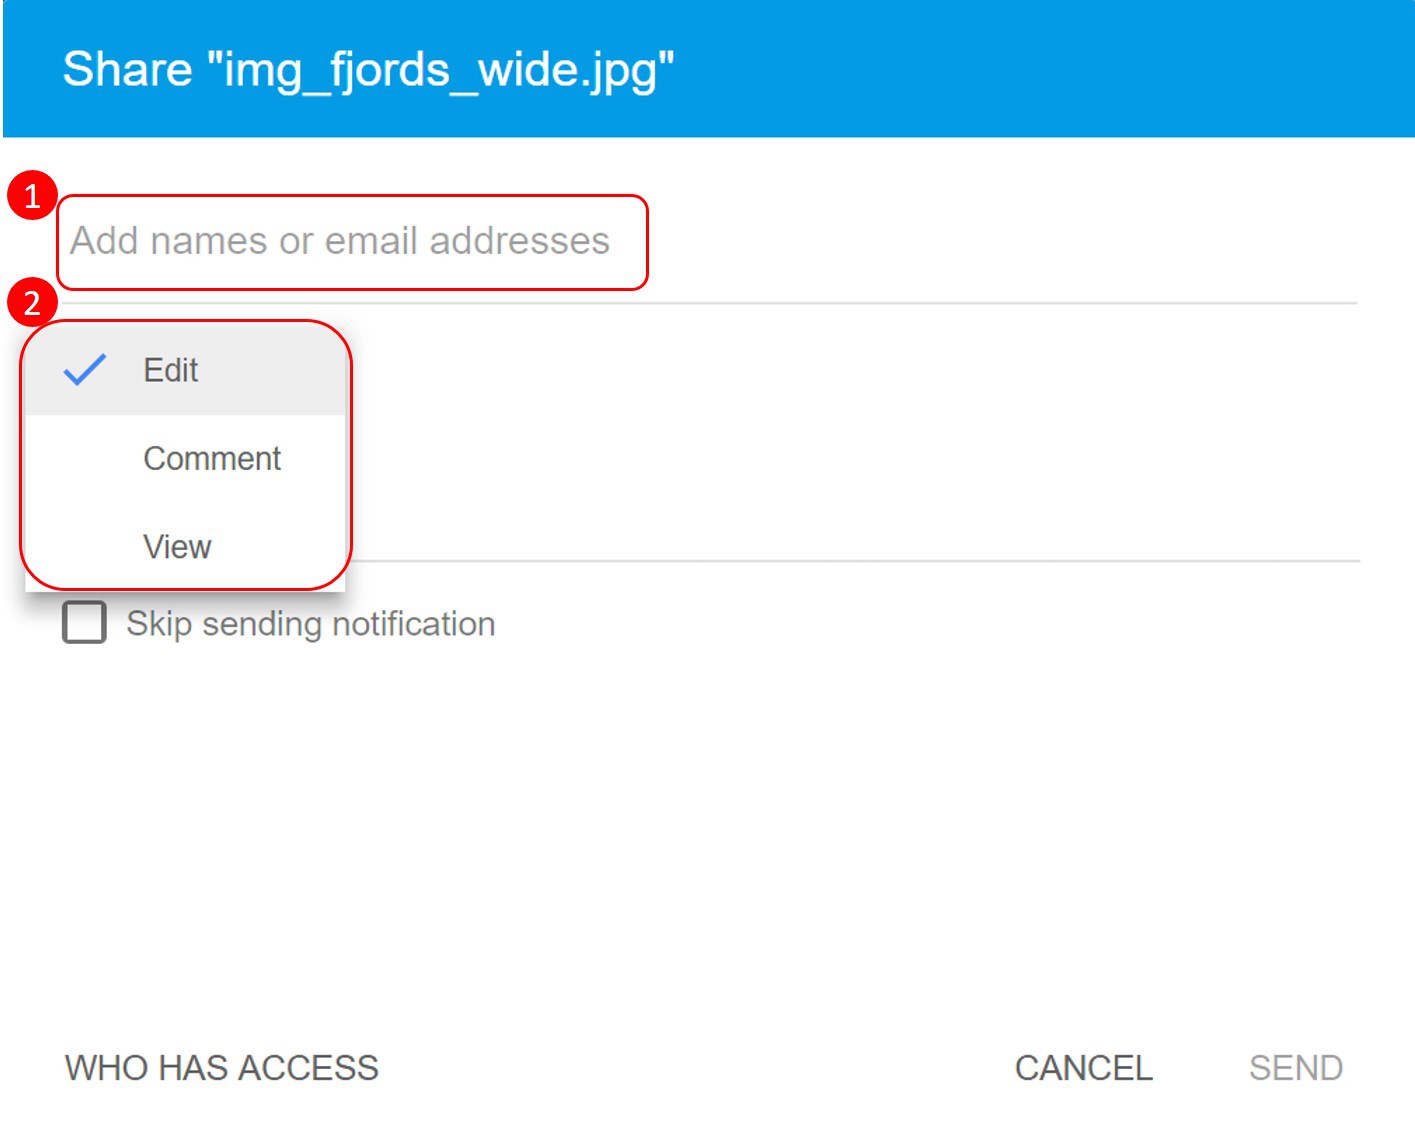
Shared options are as follows:
- Enter the email address of the user you’re going to share with, while he/she must have Google account.
- Specify the authority such as inspection, annotation or editing to the user you’re sharing with.
- When you’re sharing the file with others, you can set the instructor authority to them.
- Inspection: Users can inspect the file, but they cannot change or share with others.
- Annotation: Users can increase annotation and suggestion for the file, but they cannot change the content or share the file with others.
- Editing: Users can alter the file. They can accept or refuse suggestion. Also, they can share the file with others.
- They can choose to close the sending notice.

- Only the file can manage the file.
- Files uploaded to the cloud drive can be retained for 30 days.
- The old version of file can set to be saved for good.

Download the file to personal computer.

Create a copy of file.
|